How To Set Up Double Bass Drum Pedals
Double bass drum pedals can be a bit tricky to set up exactly right. They have a drive shaft connecting them, which must have the proper adjustments made to work as intended.
Setting up double bass drum pedals is often overlooked, especially by beginner drummers, but you must know how to adjust the pedals so that they feel nice to play, allowing you to play faster, easier, and most importantly, to help you avoid straining your ankles.
The adjustments you can make on a double bass drum pedal can be categorized into three main categories: velocity, resistance, and return. These three very important elements help you change and adjust the feel of the double bass drum pedal.
- Setting up your spring tension is crucial for effective double bass pedaling. The tension on the spring should be balanced, and not under high tension that it creates too much resistance. Make small tweaks to get it right.
- For the beater setup, you need a little bit more distance between the beater and the bass drum to achieve high velocity and a wider swing. This ensures a faster return that is optimal for double bass pedaling.
- In addition to this, you need to adjust the footboard height. If you go too low with the height, the closer your beaters will be to the bass drum. So, find that middle ground where the beaters are in range for a wide and high-velocity swing.
- For the second pedal, it’s important that you adjust the spring tension a bit lower than the main pedal. This is because the energy has to travel through the drive shaft before it makes it to the beater, hence, losing power.
Setting Up The Spring Tension
Spring tension is one of the most important adjustments that you can make to your double bass pedal. The reason why we get double bass drum pedals is to be able to play fast and concise beats. Firstly, we want high velocity to hit the kick drum hard, low resistance to help keep our stamina up when we play, and we want a very fast return so that the beater can come back faster, ready to play the next beat.
The spring on the bass pedals is responsible for the return and resistance. That being said, the best thing to do is to have a balanced spring tension so that you get a fast return but not so high tension that creates too much resistance.
One of the many mistakes beginner drummers make while setting up the spring tension is that they will adjust it too low, making it have low resistance and feel much easier to play. This, however, is only true if you play them for about a minute because while doing that, you also reduce the return of the beater.
The best setting that you can make on the spring tension is to keep it balanced. If you’re missing a lot of resistance on the springs, adjust it properly but be very careful while doing so because you are also adjusting the return rate of the beater at the same time.
Beater And Footboard Height
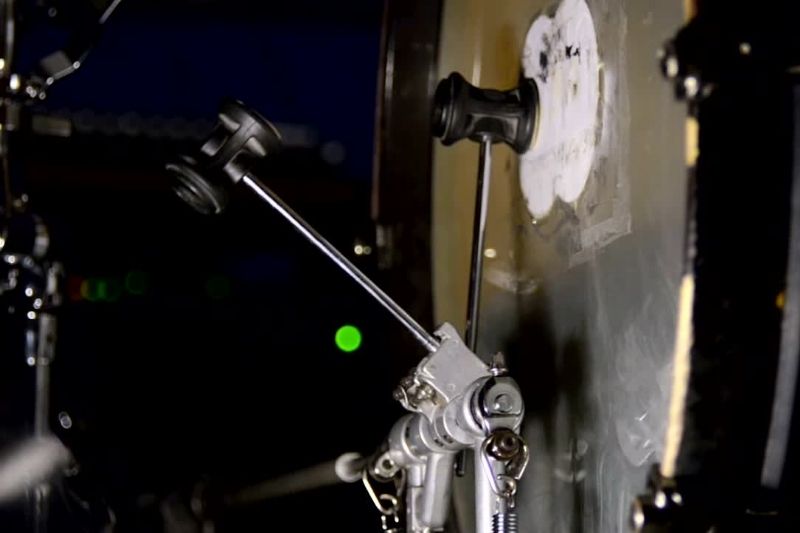
The second important setting that you need to adjust is the beater and the footboard height of the bass drum pedal. This is really important in order to keep a high velocity. A general rule of thumb is that you provide a little bit more distance between the beater and the bass drum in order to have high velocity and a wider swing, therefore, a faster return of the beater.
Another mistake often made by beginner drummers is thinking that they should set up the beater closer to the bass drum, and in doing so, they create less distance between the two, so the travel time is less. In theory, there is nothing wrong with that unless you consider the spring tension and the resistance, and only then will you understand why the beater needs to be further away from the bass drum.
Matching The Second Pedal
What we talked about before is generally true for single pedals as well. Where double bass drum pedals become a little more complicated is when you try to match the second pedal to have the exact or pretty close to exact settings as the master pedal.
The important thing to note here is when you are adjusting the spring tension on the second pedal, you want to adjust it a bit lower than the tension on the main pedal. The reason for this is really simple. You get a lot of transmission loss in the drive shaft connecting the two pedals together.
The kinetic energy that your foot produces on the second pedal has to travel through the drive shaft before it makes it to the beater, and in doing so, some of the energy is getting lost along the way. To compensate for that, we adjust the spring tension on the second pedal lower.
Matching the beater and footboard height between the two is also pretty easy. You just need to repeat the steps I mentioned before to get the correct height on both pedals. That being said, if you try to do this and fail, it might be because you haven’t connected the pedals through the drive shaft, and when you do, it all falls apart. So, before matching the height, ensure that both pedals are properly connected.
Conclusion
While getting the resistance, the velocity, and the return rate correct is really important, make sure to also experiment and figure out what works best for you. Start off with the adjustment we mention in this article and if something doesn’t feel right, adjust it. But do so very carefully, as you don’t want to go the other way.