How to Mix Drums – The Ultimate Guide

Mixing drums is a process that involves balancing the volume of the different drum sounds, removing unwanted frequencies using EQ, applying compression to get tighter dynamics, enhancing transients, shortening decays, and using additional audio effects such as reverb and saturation.
The drums are the pulsing heart of any mix. If the drums aren’t piercing through the song without superimposing, there’s a good chance your mix isn’t quite there yet. Mixing drums can be a very mysterious process for beginner and mid-level producers, but there are a few guidelines that should help you get better results.
The tips contained in this short guide should work both for acoustic and electronic drums, in the context of any DAW, and for any type of music genre. However, keep in mind that mixing isn’t a mathematical process in which all results can be predicted. Each mix has different needs and requires different mixing techniques.
Contents
The main things to consider when mixing Drums
Before reviewing each item listed below more closely, it’s important to get familiarized with the main things to consider when mixing drums.
1. Overall volume balance
It’s about using volume and gain to ensure that each drum sound is playing at a proper volume. If you can’t hear each drum sound clearly when monitoring the full mix, that’s probably a sign that you need to go back to balancing the drums.
2. Dynamic control
Audio dynamics matter always, but they’re especially important when it comes to drums. When mixing drums, your goal should be to ensure that the drums are playing consistently throughout the entire track without gaining or losing too much energy. This can be achieved with dynamic effects such as compressors.
3. Panning
Pretty much like volume balance, panning is important to create a harmonious balance between the different drum sounds. Panning also involves knowing which drum sounds should play in mono/stereo.
4. EQ
EQing drums is about cleaning individual drum sounds so that their frequencies don’t get in the way of one another. It’s another balancing technique that involves knowing which frequencies each drum sound should and shouldn’t have. Kick drums, for example, don’t always need mid and high frequencies.
5. Attack and decay
The attack is how long a sound takes before hitting its peak volume and the decay is how long it lasts before disappearing. Controlling the attack and decay is an often overlooked (but fundamental) aspect of mixing drums and is vital for ensuring that your drums aren’t mudding the mix and superimposing over other instruments.
6. Mixing the bus
Mixing the bus is about collecting all drum sounds into a single group (or drum bus) and applying effects to all the drum sounds at once. It’s usually the final step of the process, and the function of the drum bus is to ensure that the drums sound as one, pretty much like when a real drummer is playing an acoustic kit.
The tools you need for mixing Drums
To put it bluntly, the one thing you need for mixing drums is a DAW that comes with a nice selection of factory effects. There are plenty of high-quality DAWs out there (and some are even free), and pretty much all feature the fundamental audio effects required for mixing drums.
Either way, this is the equipment required for mixing drums:
- DAW – Having a good digital audio editor is pretty much mandatory unless you’re working with an old-school console and a bunch of analog tape recordings.
- Compressor – The most important audio effect for mixing drums is the compressor, especially if you’re working with real drummers (who don’t always play each hit at the same volume).
- EQ – As important as the compressor, the EQ is the audio effect used for cleaning up the drums and finding more space for sounds such as the hi-hat and the snare to cut through the mix. Mixing drums without EQ is like trying to clean the house with a broom.
- Gate – Another must-have if you’re working with real drummers, a gate effect can be used to automatically shorten the duration of drum sounds that have an unnecessarily long decay.
- Transient shaper – While many DAWs don’t feature a built-in transient shaper, it’s a good idea to get one before mixing drums. Transient shapers help you to balance the decay of each drum sound and, most importantly, they can be used to enhance the attack of drum sounds that you want to hit hard, like the kick and the snare.
- Reverb – I have mixed drums without using reverb many times before, but it’s always nice to have one in store for adding some space to drum mixes that sound too dry or unrealistic. Luckily, virtually all DAWs come with built-in reverbs.
- Spectrum analyzer – Having a visual cue while processing drums (and especially during compression) can be very helpful. You should always have a spectrum analyzer for a time of need, and the good news is that there are some great free spectrum analyzer VSTs out there.
- Additional effects – Most significantly, audio effects that can add character to the drums: a saturator, a tape simulator, an overdrive, a phaser, an exciter, and so forth.
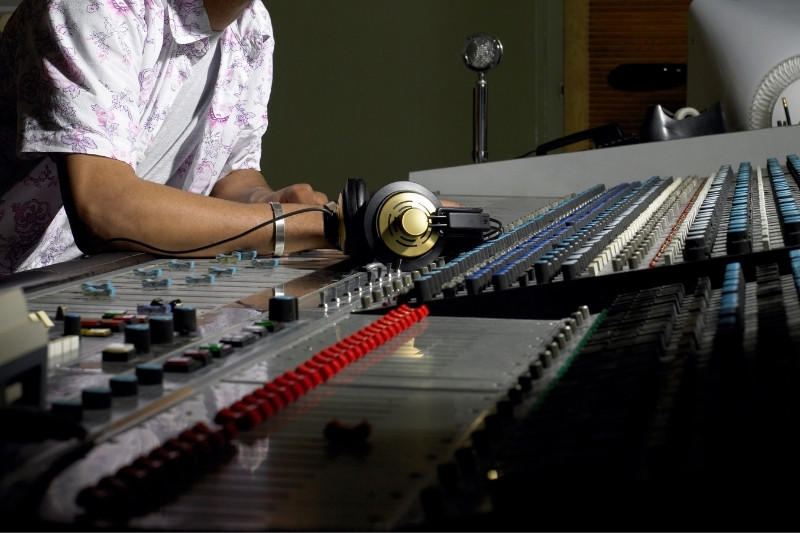
- Monitoring equipment – You need to get some quality monitoring equipment before mixing drums, even if you’re working 100% inside the box. Studio monitors and studio headphones are sadly expensive, but they’re an absolute must-have if you want to mix drums like a pro.
How to mix Drums
Before learning how to mix drums sound-by-sound, there are a few things worth considering:
1. Real drums and electronic drums are not the same
Mixing real drums is not the same as mixing electronic drums. While the principles of drum-mixing apply to both, they have very different needs.
Real drums require a lot of boost effects (stuff like gain, hard compression, and saturation) while electronic drums usually need to be tamed. For this reason, finding the right volume balance for real drums and electronic drums are two almost opposite processes.
2. You need a good performance before starting the mix
Processing drum recordings doesn’t start with mixing. First, you need to ensure that the drum tracks you’re working with are solid performance-wise.
Before adding effects and changing levels, engineers need to correct performance mistakes, deal with displaced or unwanted ghost notes, and make sure that every drum hit is hitting at the right moment. This can be a long and tedious process, but it’s utterly fundamental: no level of genius mixing will ever fix a bad performance.
3. Drum mixes only work if they work within the whole mix
It’s important to remember that drums exist within the context of a wider mix.
In other words, it’s key to keep in mind that a drum mix is only good if it works for the track. If your drum mix sounds great when you solo the drums but “disappears” once you monitor the entire track, that means that it still needs some fixing.
How to mix Drums sound by sound
This sound-by-sound guide should shed some light on how drum mixes work and what the basic role every drum sound should have in the context of the entire mix.
How to mix the kick
- Add an EQ with a high shelf cut starting around 250 Hz. I advise against using a high cut because it can take away the character (i.e., the timbre) of the kick and leave you with nothing but a boring bunch of sub-frequencies.
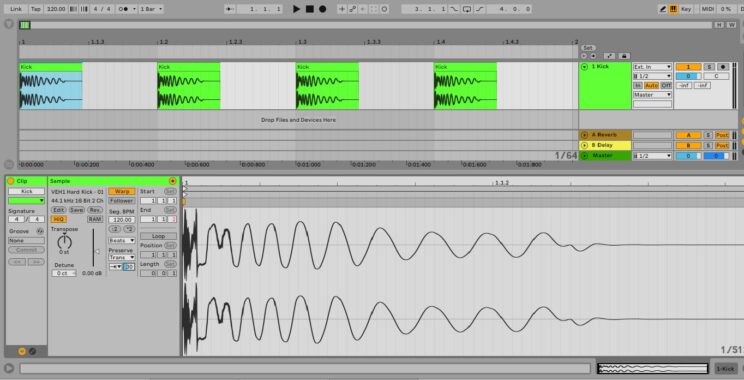
- Shorten the decay of the kick. Such can be done manually (by using a fader to reduce the length of the audio), with a transient shaper VST, or with Ableton Live’s Warp algorithm. As seen below, just select Off (→) in the Transient Loop Mode window and reduce the duration of the Transient Envelope. I get great results at around 25-45, but you should use your ears and trust your instincts.
- Compress and limit acoustic drums. If you’re working with real drums instead of samples, add a compressor with a fast attack and short release to expand the sound and make it more consistent. As an extra safety measure, throw a limiter in there to prevent clipping.
Is the kick not hitting hard enough?
That’s when a transient shaper comes in handy. Just push the attack/transient knob up and you’ll notice that the kick’s transient (the moment it first hits) gets much louder.
Is the kick too bassy?
If you need more mid and high frequencies for your kick to cut through the mix, just go with a nice saturator or distortion effect (basically, anything with a drive knob). The added distortion will create harmonic overtones that will give some color to the kick.
Is the kick too abrasive?
If your kick is out of control and superimposing over the mix, don’t just turn down the volume. There’s probably too much stereo width to it, so all you need to do is to convert it to mono.
How to mix the snare
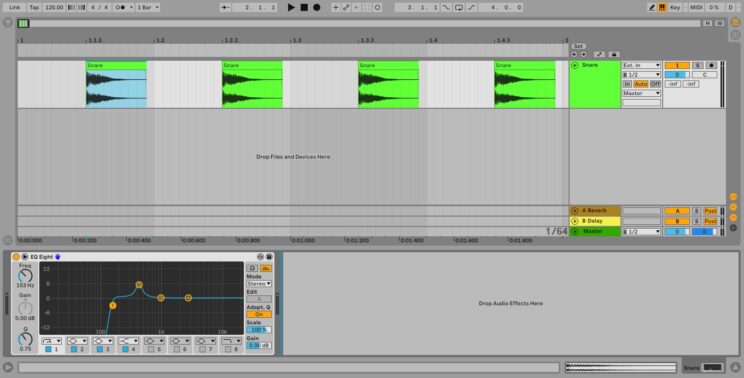
- Add an EQ with a low cut at around 150 Hz to get rid of unwanted low frequencies. If needed, use a bell filter with a low Q to bring up the fundamental frequency of the snare (the point of the frequency spectrum with the highest amplitude). It should look something like the picture below and help the snare sound much brighter.
- Use a multiband compressor to tame the snare’s high frequencies. If a snare is sounding too noisy, don’t just compress it. Keep the hard-hitting fundamental transients of the snare while just compressing the highest frequencies of the sound. You need a multiband compressor to do so, but it’s wonderful for keeping some free headroom for the cymbals.
- Add reverb to the return track. No, don’t go full 80s mode. You shouldn’t use too much reverb on the snare, but a little bit of reverb playing through a return track is ideal for making a boring snare look much brighter and lively. Particularly important if you’re working with digital samples.
Is the snare not sitting right in the mix?
If a snare sounds good but feels off, that’s probably because it’s not tuned. Transpose the snare up and down until you feel like it “belongs” to the song.
Is the snare not powerful enough?
If you’ve tried everything from compressors to exciters to make a snare pop and it doesn’t, it might be a good idea to double it. Choose a short sample with a strong transient and add it to each snare in the track. This way, you can keep the original sound of the snare while also providing it with the snap it so desperately needs.
How to mix cymbals
- Remove unwanted frequencies using a low cut (you can be aggressive with cymbals) and give them a boost at around 1.75 Hz with a bell filter.
- Add some space to the cymbals by increasing stereo width. While kicks and snares sit right at the center of the mix, cymbals and other high-pitched percussive sounds belong to the sides. In Ableton Live, increasing the width knob in the utility effect up to 200 can get you great results.
- Use panning automation to add dynamism to the cymbals. This doesn’t work with all cymbals, but it’s a game-changer when it does. Just automate the panning of each cymbal sound so they play on different sides of the stereo field, simulating the right and left hand of a real drummer. In Ableton Live, a similar effect can be achieved automatically with the auto pan effect, as seen below. Just make sure that the effect is running at the right tempo (for a 16th-beat hi-hat pattern, for example, select a 1/16 rate).

Are the cymbals too noisy?
Cymbals can get excruciatingly noisy as the mixing stage progresses, so it’s important to tone them down whenever it’s necessary. Keep in mind that, unlike kicks and snares, cymbals don’t need to hit hard, they just need to be noticeable.
Are the cymbals too flat?
That’s a sign of too much compression. Out of all drum sounds, cymbals are the hardest to compress. If you overdo compression, they will sound too static and lose their human element. Compression to the cymbals should be applied very carefully and with a gentle attack and short release.
Relevant audio techniques for mixing Drums
As stated, every mix is a mix and all mixes have different needs. But mixing drums can get a whole lot easier when you can rely on these three tried-and-tested mixing techniques:
1. Parallel compression
Also known as New York City compression, parallel compression is the technique of adding a strong compressor with 50% dry/wet to the drum bus to make the drums pop and sound more glued together.
Half of the drums remain unprocessed and keep their human-like dynamics while the other half is cranked up and helps the drums to sound more cohesive and radio-friendly.
When adding parallel compression, try to go with the best compressor you have in hand. Waves SSL G-Master Buss Compressor, Universal Audio Teletronix LA-2A, and even Ableton Live’s glue compressor can get you great-sounding results.
2. Sidechain compression
Sidechain compression is the technique of using the signal of an instrument to trigger the compressor of another instrument. Most available DAWs feature a compressor with a sidechain option. Here’s how it’s used in Ableton Live:
While sidechain compression is known for being a creative effect, it’s also great for mixing drums and solving overlap issues. It’s most commonly used to glue the kick drum and the bass together, as both tracks tend to occupy similar frequencies.
Before using sidechain compression, make sure you adjust the decay of the kick so it doesn’t cut too much of the bass away.
3. Mid-Side EQ
Surprisingly enough, one of the best ways of shaping the stereo field of drums doesn’t involve using the panning knob. Most EQs feature a mid-side option, meaning you can change the mid and side frequencies of any given sound separately.
Mid-side EQ can be hard to use and I wouldn’t recommend it to first-time producers. However, it’s extremely effective for cleaning up the mix and ensuring that every sound has room to “breathe.”
The most common way of using mid-side EQ for mixing drums involves removing all mid and high-side frequencies from the kick and leaving just the side frequencies of the cymbals.
Where can you learn more about mixing Drums?
YouTube is one of the best sources of information on all matters related to mixing, and mixing drums is no exception. These are some of my favorite videos on the topic:
The philosophy of mixing drums according to a legendary audio engineer.
Perhaps the most comprehensive visual guide on how to EQ a kick drum (which is arguably one of the most crucial steps in mixing drums).
Some great tips for getting the most out of a real drum recording.
Conclusion
It would be cool if the art of mixing was an exact science. But for better or worse, it isn’t.
There’s no exact set of rules for how to mix drums correctly, so don’t believe the clickbait and take your time. Learning how to mix doesn’t happen overnight, and drums are one of the trickiest instruments to dominate.
This article alone won’t teach you how to mix drums, but hopefully, it has provided you with vital information on what is drum-mixing, which aspects should be considered when mixing, and what is needed for a drum recording to sound good.